
Feb 19, 2020
Simulating Symmetry with A Roller on the Pilates Reformer Exercises
by Stephanie Herman
Asymmetry in our bodies can have a variety of causes. It can be caused by compensation patterns, leg length discrepancy, scoliosis, accidents, cartilage deterioration, or many other reasons. Whatever the reason, there are methods to stabilize and improve these inefficient compensation patterns. When we are asymmetrical, our skeleton starts to develop compensatory mechanisms that can result in misalignments, potentially causing specific muscle fibers to stop firing as efficiently as they should. My method offers exercises that require the body to override these inefficient patterns, and it will cause activation of proprioceptors needed for proper balance and alignment.
I am a former principal ballerina who has worked directly with Carola Trier, first disciple of Joseph Pilates in 1973. In my years since being a principal ballet dancer, I have felt akin to a scientist because I am always striving to learn more about the human body, and how to heal and strengthen the body to its fullest potential.
I have recently performed again at the young age of 69! I am striving to defy the aging process for my clients and myself, and I hope to be a motivator for those who think aging means it is time to cash in your chips and give up your dreams. I think getting older means it is just time to get smarter!
Today’s lessons are composed of two steps:
Step One: Standing Posture against a roller lengthwise on the wall. Teaching the beginning stages of properly owning your posture before moving onto Step Two.
Step Two: Introduces a roller to the reformer, causing a dynamic instability to the exercise. I love the roller because it gives great sensory feedback thus helping the body activate the proprioceptors needed for a more balanced body.
Step One:
Skeletal Posture with the Roller:
-
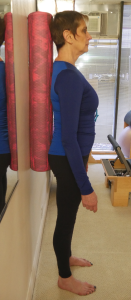
Start standing with a roller positioned vertically on the wall, your head and tailbone on the roller. If you find it is difficult to get your head on the roller because of your alignment limitations, then place a cushion behind your head so that it can rest comfortably on the roller (just as you might adjust the head piece up or down when you are on the reformer). I believe people need to take their time while trying to explore their bodies. I don’t believe in forcing things, my motto is: “Find It, Feel It, Own It, Move It!”
Bad Posture on Roller
-
Allow your shoulders to drop and your shoulder blades to gently wrap around the roller without changing the placement of your tailbone.
-
Understanding your upper thoracic spine is also very important. Many people (including dancers) overexaggerate their ribcage lifting up. Try lifting up your ribcage first then allowing your ribcage to rotate posteriorly as if to touch the roller. The first time you do this, you can allow your shoulders to follow in the movement. The second time you to do this, try not to let your shoulders move but keep them stabilized against the roller. You might not be able to move much, but this is an exercise to give you more feedback on the difference between poor exaggeration and proper posture focus. If you look at a skeleton, you will notice how the angles of the ribs form the most posterior extent of the thoracic cage. Now try to keep the rib cage along the roller as you lift only your heart and upper thoracic spine. Play with owning this skeletal alignment until you start to feel more comfortable.
Muscular Awareness and Activation:
Applying the above skeletal posture, now add:
-
Lengthen your waist along the roller by activating your abs like a vacuum towards the roller without pelvic tilting or changing your skeletal alignment. You may retain a neutral spine and try to keep your ASIS (Anterior Superior Iliac Spine – the top of your pelvis) lifting up. Be careful not to overarch your spine. Explore this new activation sensation by repeating several times.
 Good Posture on Roller
-
Hold this position about 10 seconds while also breathing into your diaphragm. Repeat until you feel you are starting to get a better sense of what you are searching for in your posture. Don’t force anything!
Step Two
-
Place the roller on the reformer in between the shoulder pads and the end of the reformer bed. Put on 2 red (full) springs or 1 red (full) and 1 blue (half).
-
Carefully lie on the roller so that your head and tailbone are touching the roller with your feet on the bar.
-
Reapply the skeletal posture achieved in Step One now that you are lying down on the roller. Stabilize your posture by allowing the back of your ribs to rotate towards the roller without changing your shoulders, which are gently down and back. Think of your scapulae like two hands gently wrapped around the roller. Your abs are like a vacuum being pulled towards the roller yet also lifting up your heart. Maintain the ASIS lifted without pelvic tilting. Keep your tailbone on the roller.
-
With your arms down on the mat, gently take about 8 seconds to straighten your legs in order to move the carriage without wobbling on the roller, exploring where you might want to fall off. This will give you sensory feedback on where you are weak in your stabilizing muscles. Repeat 10 times.
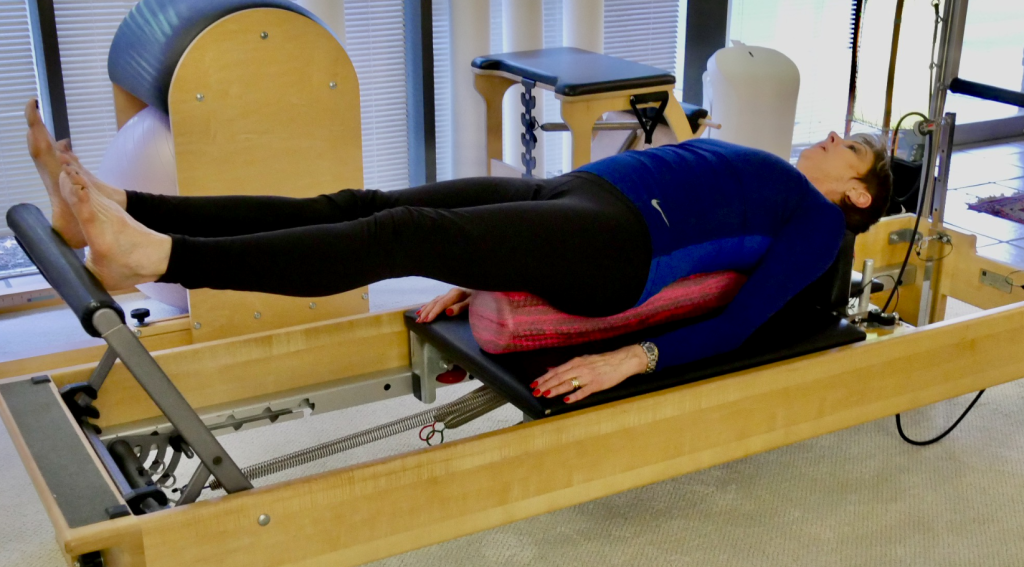
Posture on Reformer & Roller
Tips:
-
I like to remind people about bone rhythms. When you straighten your legs, your femur rotates internally; when you bend your knees, your femur rotates externally. Be aware of how the femur is rotating in your hip socket as you then find your leg muscles following with this movement.
-
When you straighten your legs, your sit bones come together; when you bend your knees, allow the freedom of your sit bones to separate.
-
There are muscles wrapped around the sit bones – try to activate them once you comprehend the responsibility of the sit bones. Don’t forget to still activate your pelvic floor and core.
-
Think “Ribs down, Heart up”. Many people overextend their ribs up in the air, losing the strength from the upper core. Please keep ribs against roller and shoulders down and back, but heart lifted.
Level 2:
Variations on a theme:
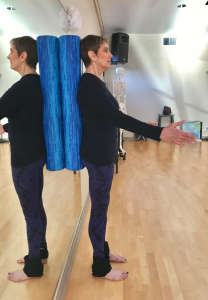
- Try lifting one arm as you straighten your legs, remembering your bone rhythms
Play with it:
-
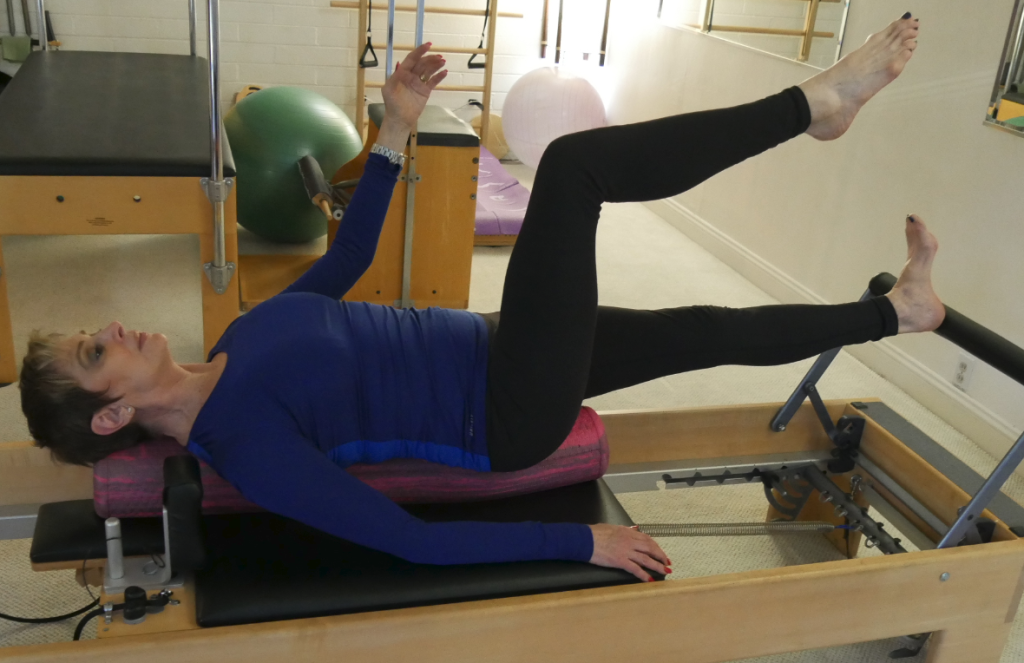
Try one leg up in tabletop with both arms down. See how your body might want to sway. Go slowly so you have enough time learn how to stabilize..
- Try both arms up with one leg into tabletop.
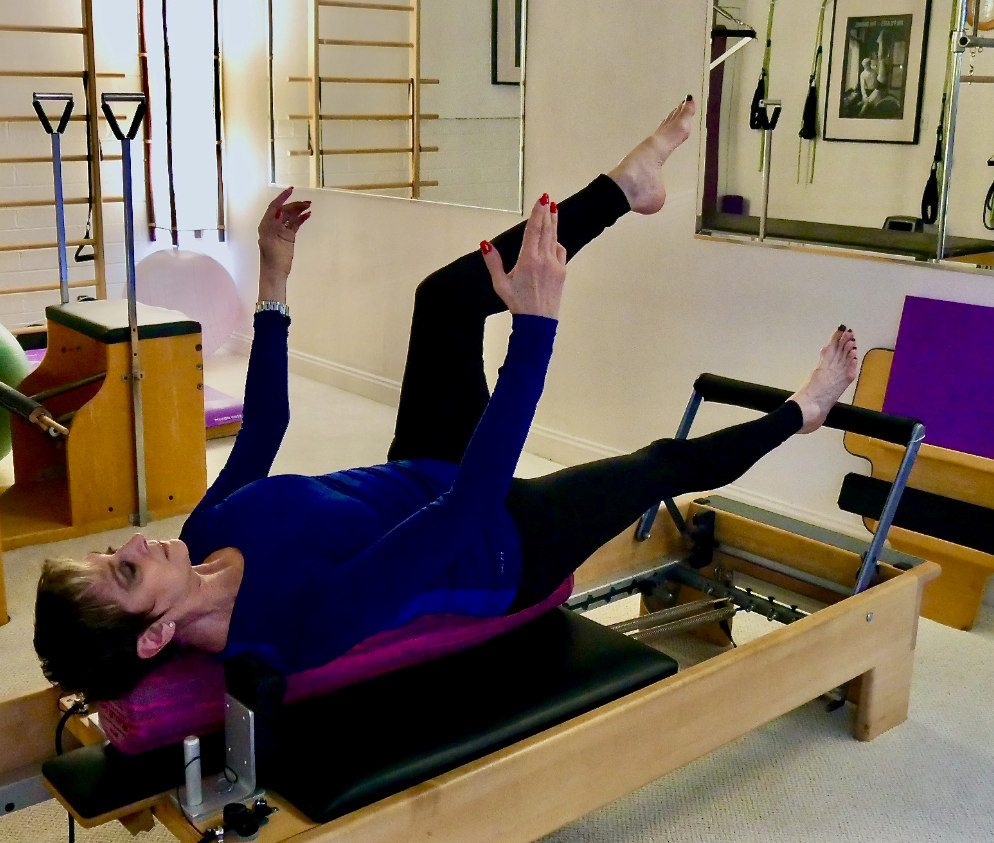 Look Mom! No Hands!
-
-
-
 PMA CPT Pilates Master & ACSM Certified. Stephanie Herman brings 50 years of knowledge, training, and experience to her teaching methods: “Fitness Through Conscious Movement”, “Pilates Ballet by Stephanie Herman®”, and “Pilates CoreTique® Teacher Training”.