
Issue #461 – Wednesday, May 21, 2025
Tips and Techniques for Mastering the Pilates Push Up
Part 2
by Cathy Pagani
Is there anything new to be said about learning to do Push Up? It turns out the answer is “yes.”
In Part 1, we discussed using a three-pronged approach to developing competency in performing Push Up, the final exercise in the classical Pilates mat sequence and one that requires strength, stability, control, balance, and full engagement of the body from head to toes. Using props commonly found in most Pilates studios, we will consider the specifics on how to master Push Up.
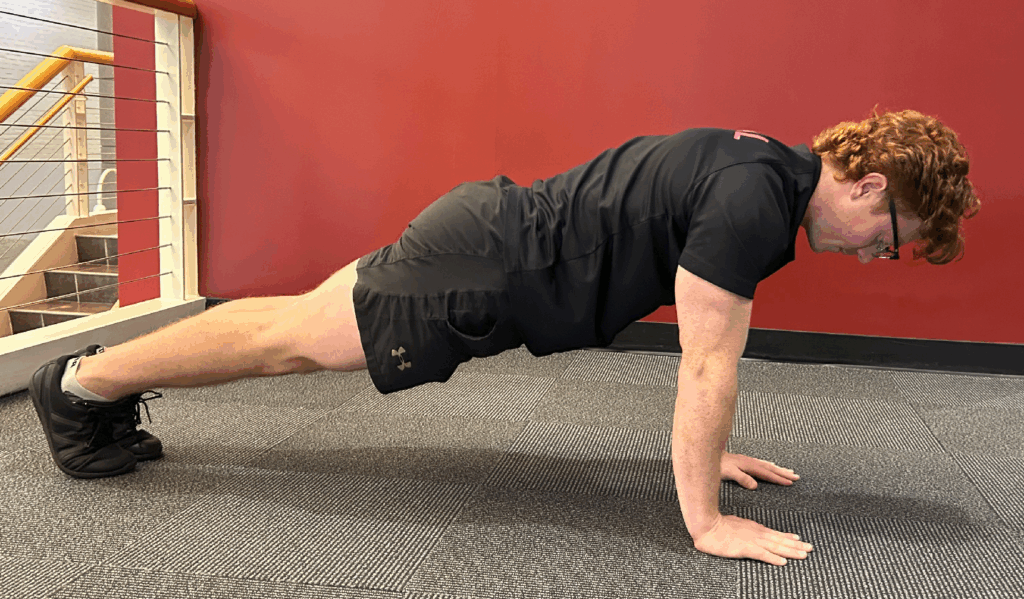
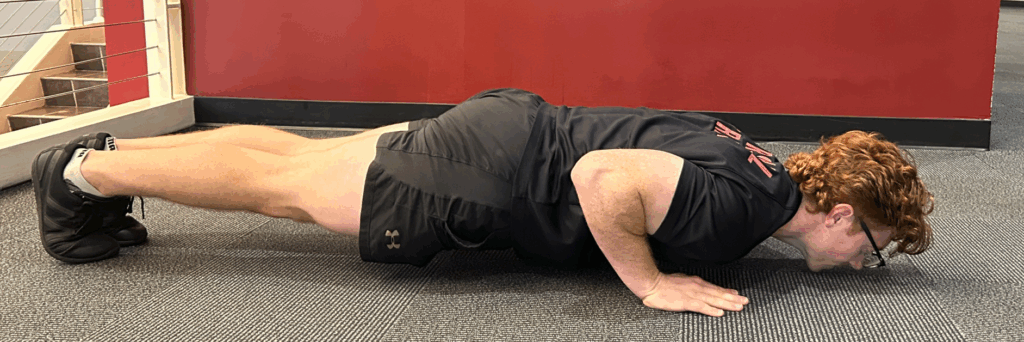
The Push Up, as described by Mr. Pilates in Return to Life (1945), has the body is in a fixed, straight line from head to heels with weight on the toes and palms. The hands are shoulder-width apart and pointed forward. The body is lowered until the chin just touches the mat and the chest hovers over it. The hands then press into the mat to return the body to a plank. Throughout the exercise, the upper arms stay firmly pressed against the torso. The head does not drop, the lower back does not sag, and the Powerhouse is fully engaged. There is a lot going on in Push Up. This is an important exercise and one of the most effective ways to build upper-body strength.
Getting a Feel for the Exercise
Equipment: Pilates Ring
It is important from the outset to understand correct body positioning to perform Push Up properly. The elbows are adducted (kept close to the body), the shoulders are externally rotated, and the scapulae are retracted (pulled toward each other). This allows for optimal muscle activation by also engaging the triceps and the anterior deltoids, increases stability of the shoulder girdle, provides for better control and power, and reduces risk for shoulder and elbow injury.
A simple way to get a feel for the exercise before adding the challenges of body weight is to work on the movement of the shoulders and arms while standing. Practicing the tucking of the elbows and engaging the Powerhouse without the stresses of load is important in beginning the journey to a full Push Up. This also helps to build the neurological pathway for the exercise. A Pilates Ring can help us mimic the movements.
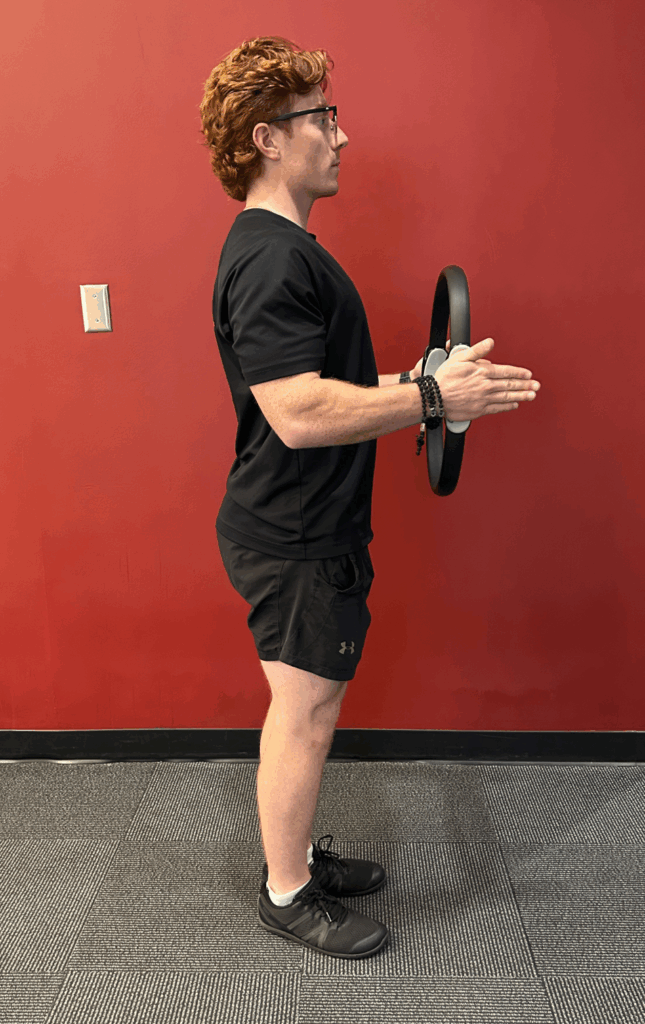
To begin, stand, with feet in a Pilates V, holding the Pilates ring with elbows bent to 90 degrees and upper arms pressed against the body. Retract the scapulae by squeezing the shoulder blades together and down towards the spine. This helps to prevent the shoulders from rolling forward. With the palms of the hands on the pads of the Pilates Ring and fingers extended, inhale, drawing the abdominals in and contracting the gluteals. Smoothly compress the Ring, making sure to keep the upper arms pressed against the body and the scapulae retracted. Maintain these muscle contractions as you slowly release the Ring.
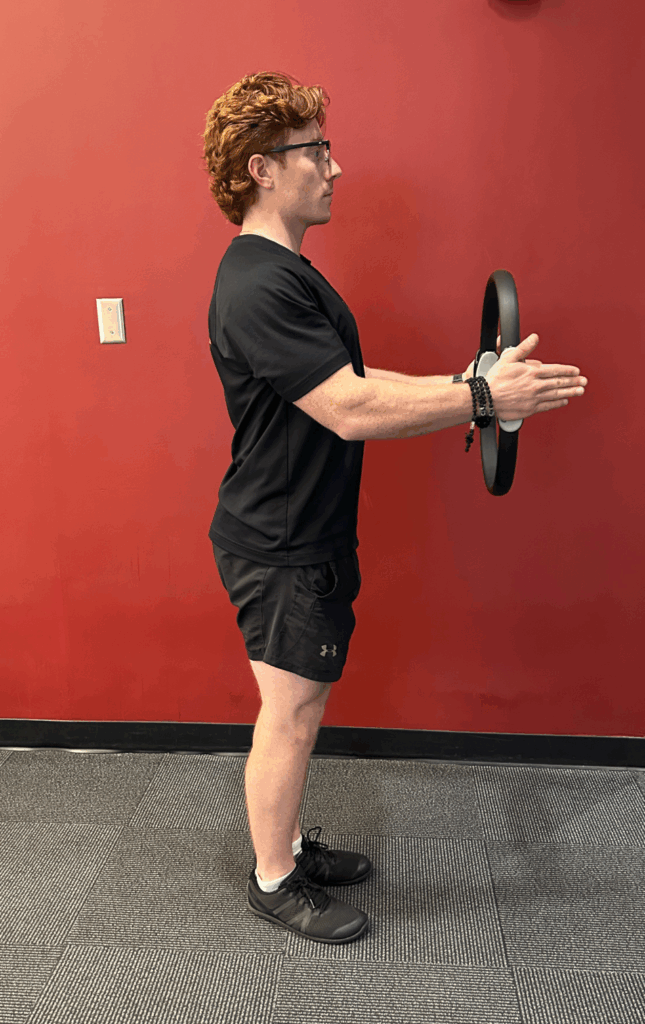
Once you are comfortable with this exercise, add movement of the arms away from the body while maintaining the muscle activations mentioned above.
Flexibility
Equipment: Yoga Strap
Although often overlooked, wrist and ankle flexibility are key to performing Push Up. They allow for proper weight distribution and body alignment during movement so that we may work a full range of motion without compromising form or causing strain. In short, your Push Up will suffer if your wrists and ankles are not sufficiently flexible.
There are a number of effective exercises that can help increase ankle and wrist flexibility. Here are two suggestions:
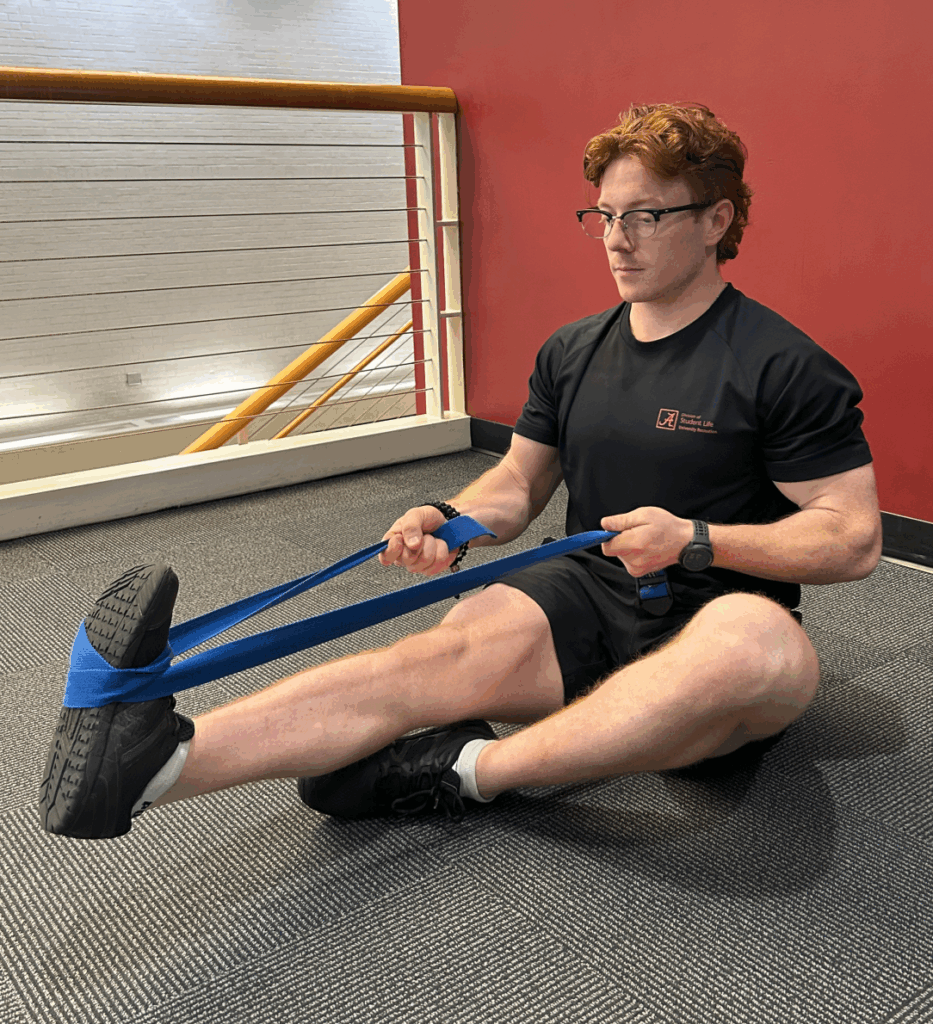
Ankle flexibility: sit on the mat with one leg extended and the other bent. Holding a yoga strap in both hands, loop the strap around the ball of the foot of the extended leg. Gently pull your toes toward you, hold for 20 to 30 seconds, and release. Variation: keep the foot flexed, hold the strap taut, and press into the strap with your foot. Hold for a 5-count and release. Repeat.
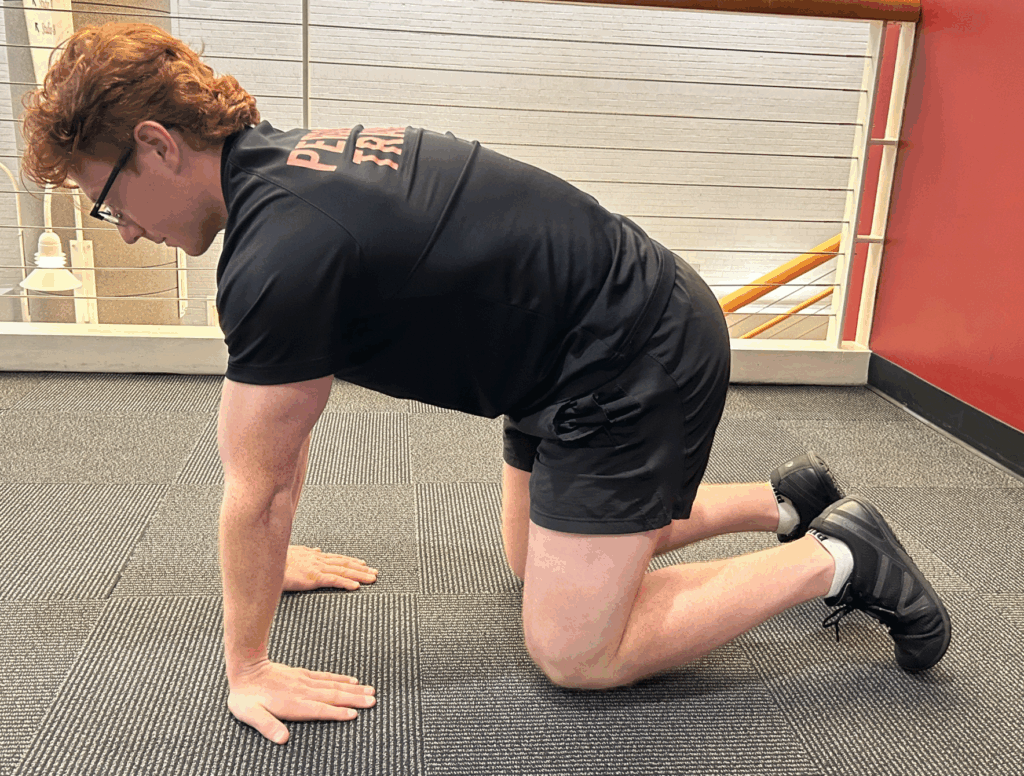
Wrist flexibility: kneel on a mat and place your hands in front of you so that your fingers are toward your knees. Keep your palms flat on the mat and shift your body back toward your heels so that you stretch your wrists/forearms. Hold the stretch for five to ten seconds, release and repeat until you have done five repetitions.
Keep in mind that flexibility exercises need to be done regularly to increase and maintain appropriate flexibility. Consistency and patience are key: try to do them three to four times a week. For your Push Up, gripping a pair of hand weights may relieve pressure on the wrists until you develop sufficient flexibility to have your palms flat on the mat.
Now let’s take Push Up to the mat.
Using Regressions to Build Strength and Technique
Equipment: Pilates Ring and Yoga Block
Regressions are an essential part of developing the strength and technique needed for Push Up by making the exercise easier to do. This involves shortening the lever of the body (working from the knees) and decreasing the amplitude (the height of the Push Up). (A common regression for Push Up involves elevating the upper body by placing your hands on a bench or a countertop. This, however, is not as effective as placing your hands on the mat. Incline Push Ups are easier because they target different muscles and activate the main muscles differently. They focus primarily on the chest, while standard Push Ups also engage the triceps and anterior deltoids. Standard Push Ups work against the full weight of the body, recruiting the abdominals and other stabilizing muscles that incline Push Ups do not.)
The following is a step-by-step plan to develop competency for your Push Up. Do not move on to the next step until you can comfortably complete three sets of five repetitions at each level.
Finding the Right Position for the Hands Relative to the Shoulder
Sometimes it is hard to know where to place our hands to do Push Up. This little drill will help you find appropriate placement. Begin in a prone position on the mat with your forehead touching with your hands at your shoulders, elbows tucked, and fingers facing forward. Press up to a plank on the knees. Your hands will be directly under your shoulders, putting you in the proper position for your Push Up. Be sure to keep your head aligned with your spine, your gaze slightly forward, and engage your abdominals and gluteals.

Regression 1: On the Knees
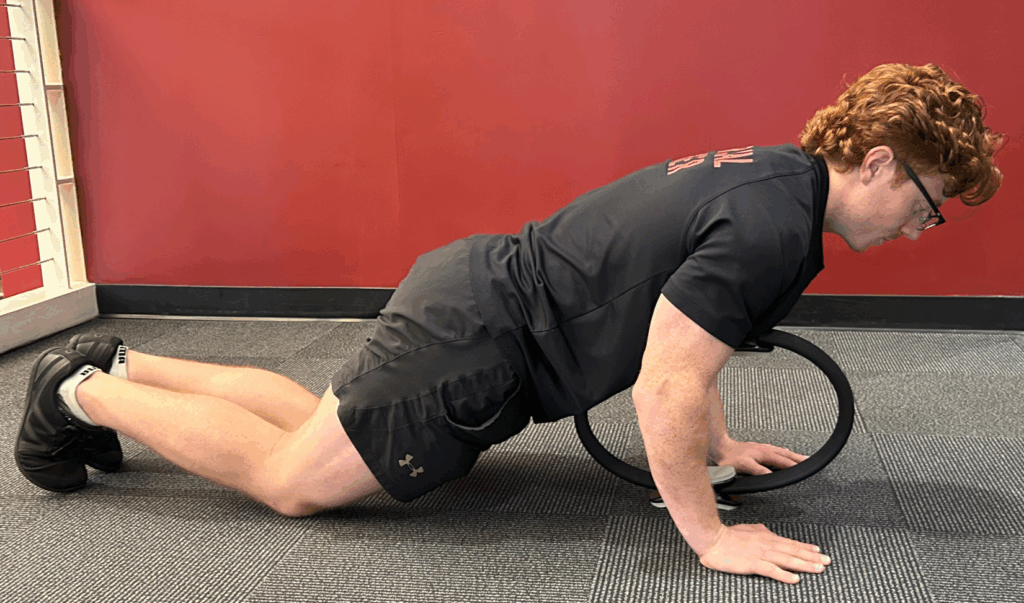
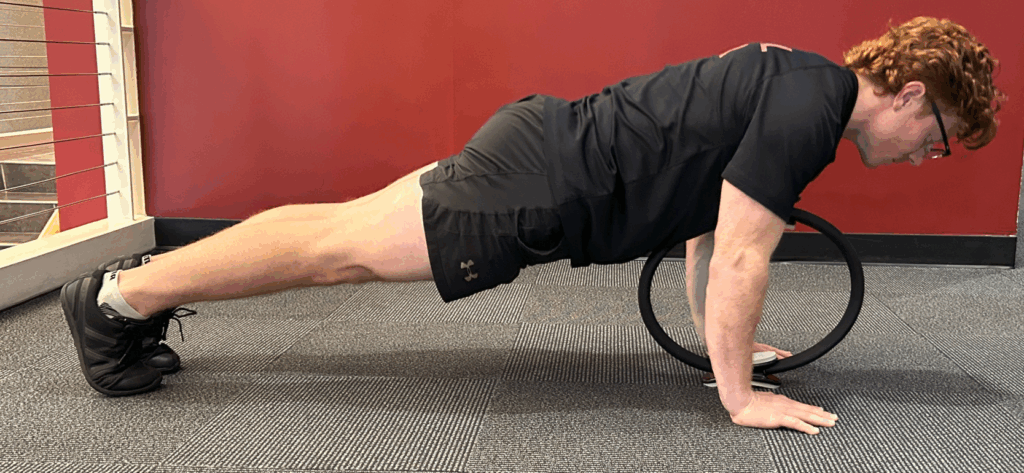
A. Pilates Ring at the sternum
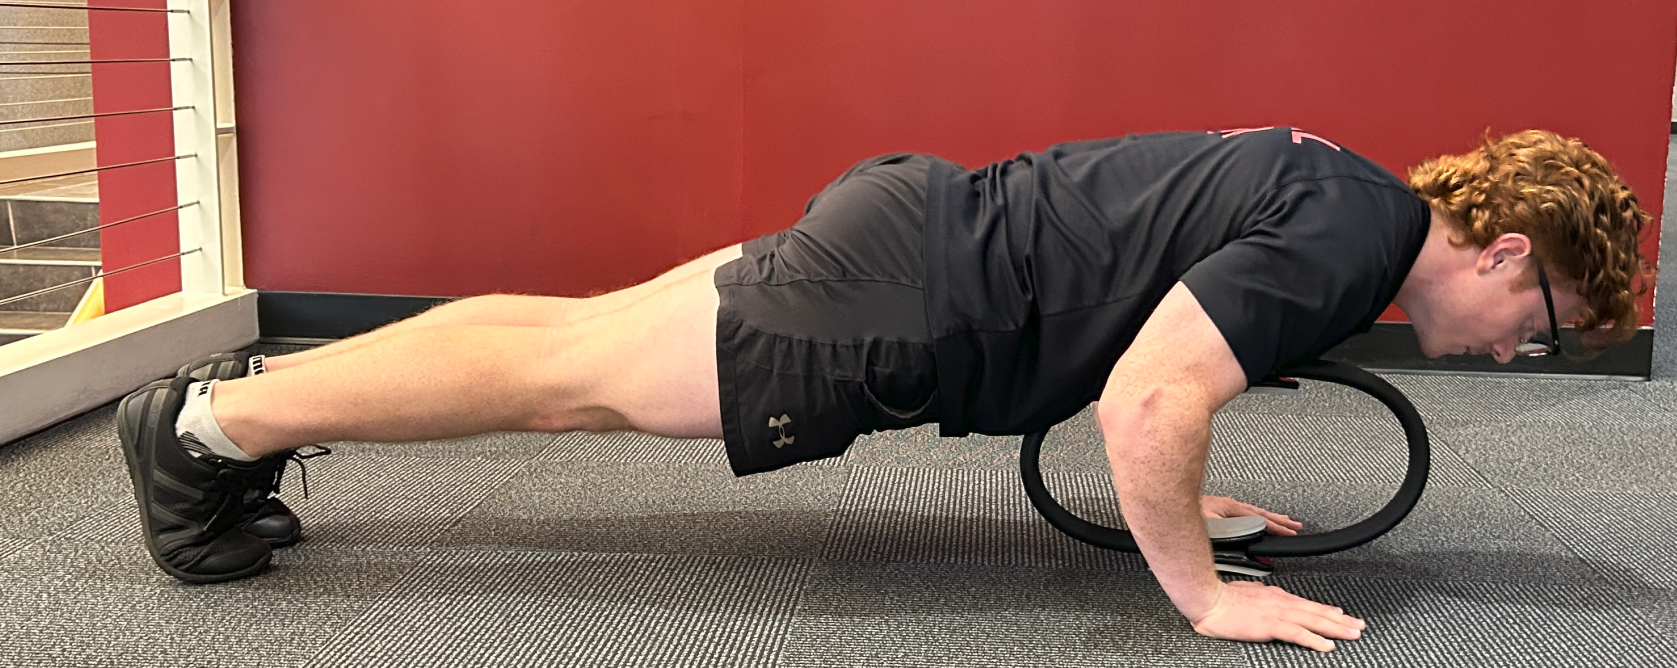
In a kneeling plank, place the Pilates Ring at the sternum, as pictured. The light support provided by the Pilates Ring allows us to focus on our form – a straight back with our head in line with the spine — and proper muscle activation and we lower ourselves a few inches and the press ourselves back to our kneeling plank.
B. Yoga Block
The next step is to work the kneeling Push Up without the assistance of the Pilates Ring while keeping the amplitude tightly controlled. A yoga block can serve this purpose. Position a yoga block on the mat at its highest level so that it will contact the sternum as you lower yourself down. As you become proficient with the block at this height, incrementally increase the amplitude of the Push Up by first positioning the yoga block at medium height, then at its lowest height, and eventually removing the yoga block altogether. Do not worry about getting the chest to the floor; having the upper arms parallel to the ground is sufficient at this stage. Just be sure that you maintain proper form.
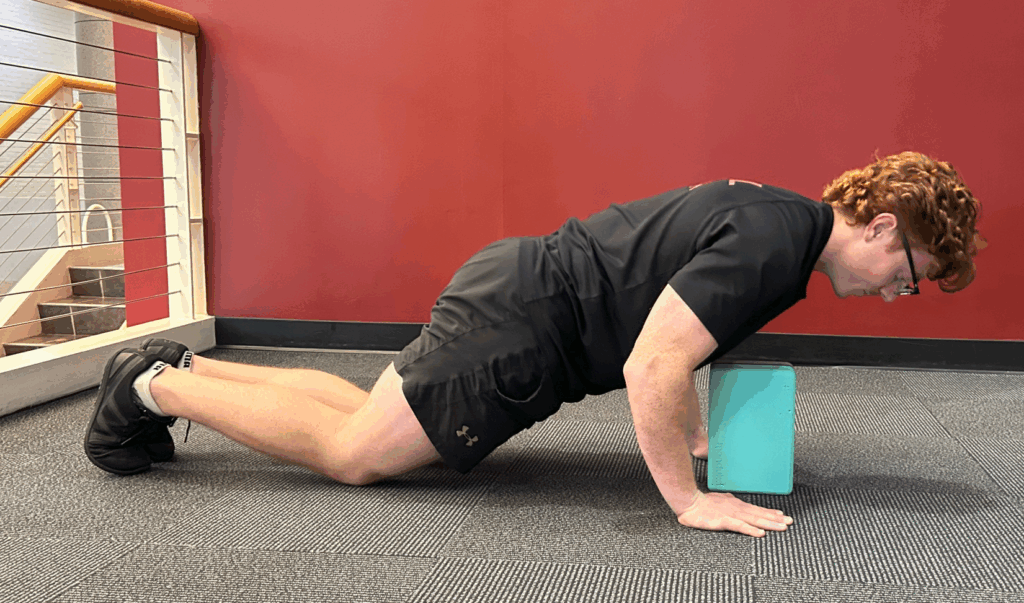
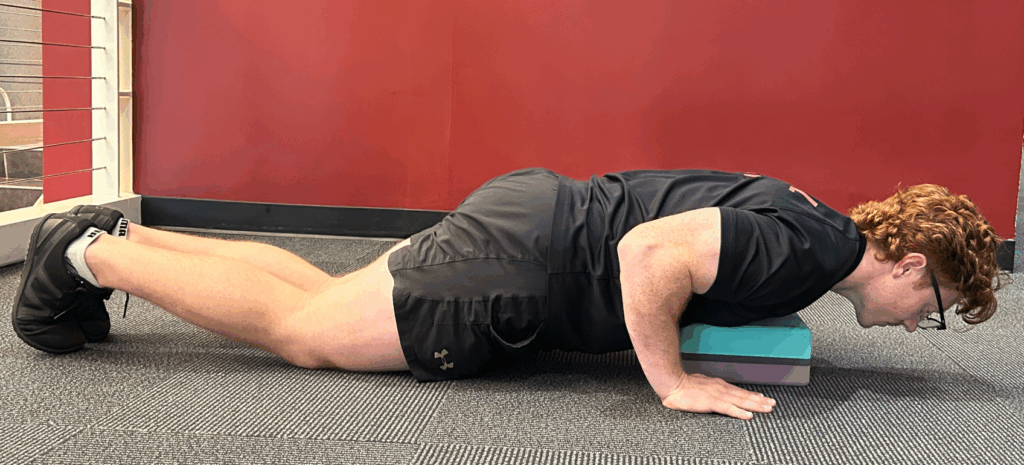
Regression 2: On the Toes
Once you can do three sets of ten Push Ups on the knees, repeat the sequence above in a full plank on the toes.

As you progress to doing a full Pilates Push Up, remember that the small things matter and hold the keys to our success. Be patient: the journey to a strong Push Up requires us to progress incrementally: we do not advance to the next level until our strength, technique, and flexibility allow it. Before you know it, you will master this challenging and very functional exercise.
Special thanks to my colleague, Mitchell Roussey CPT, CSCS, who kindly demonstrated the exercises.

A triathlete who competed at national and international levels, Catherine began her classical Pilates journey after a running accident resulted in a total hip replacement. During her rehabilitation, she discovered the power of Pilates in helping her get back on her feet. In fact, in many ways, she was stronger than she was before her injury. She realized, “I would have been a much better athlete had I known about Pilates 20 years ago!” It was then that she decided to pursue teacher training so that she could work with others to help them achieve optimum strength, awareness of movement, and flexibility. She is passionate about spreading the word on how developing a regular practice in classical Pilates is a life-changing and life-long pursuit — and it can be embraced by everyone.
Catherine recently retired as a professor of Asian art history and associate dean of the Graduate School at The University of Alabama and now teaches part-time for the university’s department of kinesiology, where she offers classes in indoor cycling and Pilates for university credit. She is a graduate of Streamline Pilates’ 450-hour intermediate-level teacher training program. She has been a certified Spinning® instructor for 24 years and a certified Personal Trainer for the past 20 years. In addition, she holds a Ph.D. in East Asian Studies from the University of Toronto.